Having learnt to soften light using diffusers in the previous exercise, this explores how we can change the contrast in a scene that is lit by photographic lighting by filling the shadows and reducing the difference between light and shade.
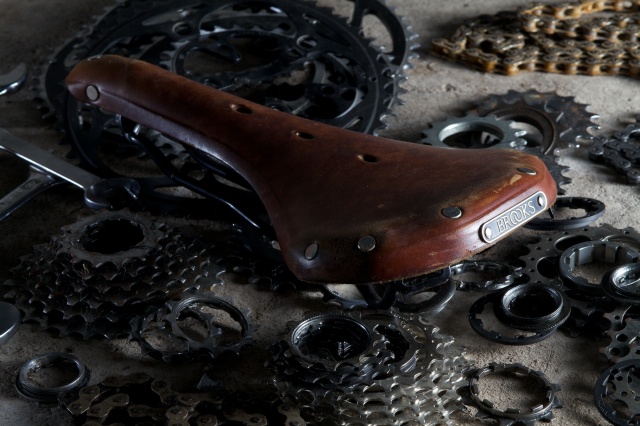
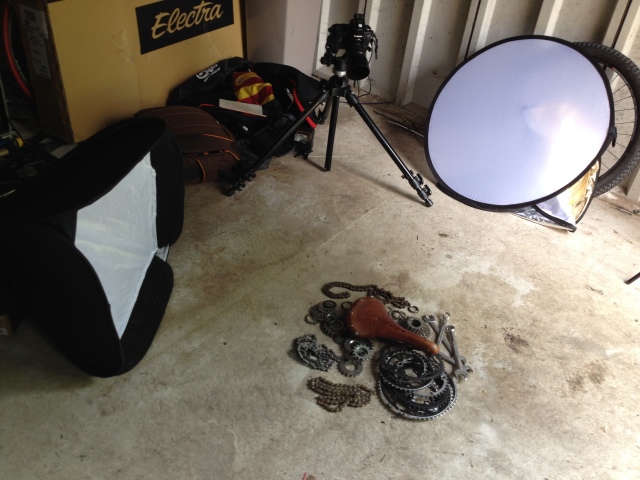
The camera was mounted on a tripod with a 100mm lens looking at a pile of junk on my shed floor carefully constructed still-life arrangement with the flash 90cm to the right of the shot and slightly higher than the subject, set at full power. Camera settings remained the same throughout the shoot.
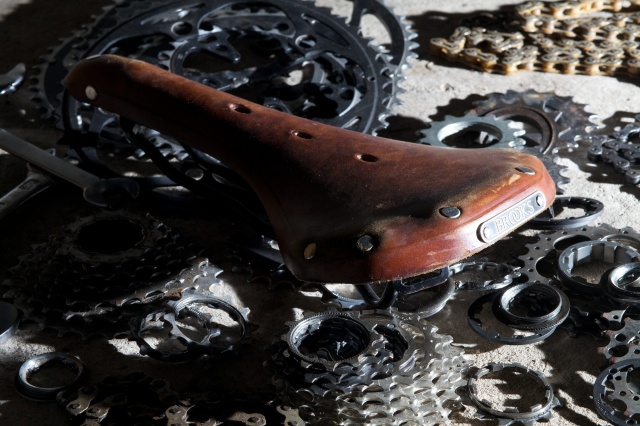
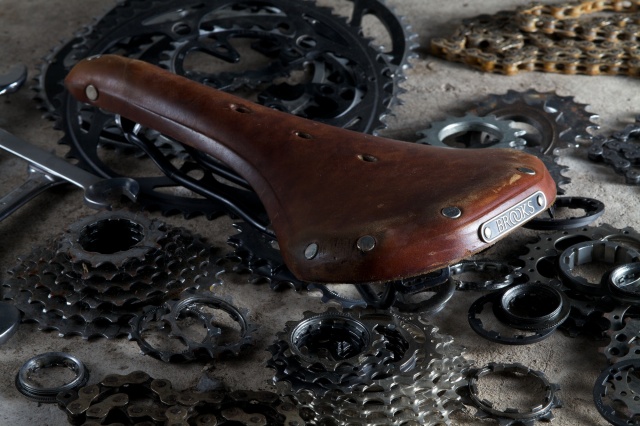
First off, I photographed the scene with the flash gun only. As seen previously, this high-contrast light gives sharp-edged shadows and high contrast – that is a big difference between the lightest highlights and darkest shadows. It means that any part of the scene that is in the shadow of the saddle and cogs to the right of the image are invisible in shadow.
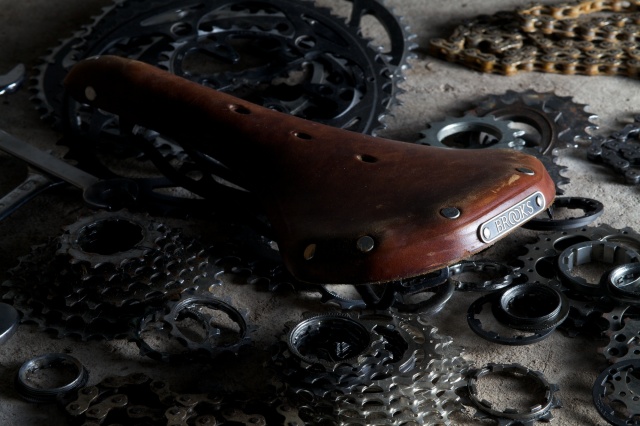
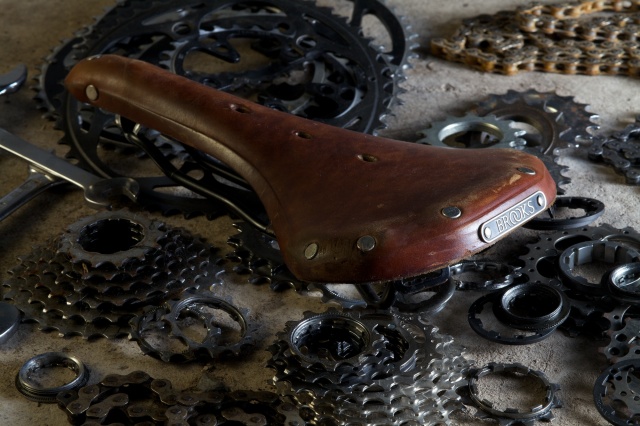
Next up, I fitted the same 60cm square diffuser used in the previous exercise. It softens the edges of the shadows and because the size of the light source is bigger, it is able to light areas that were in shadow when only using the flash. The contrast is reduced, but at the same time, because the same exposure settings were used, the image is slightly darker overall.
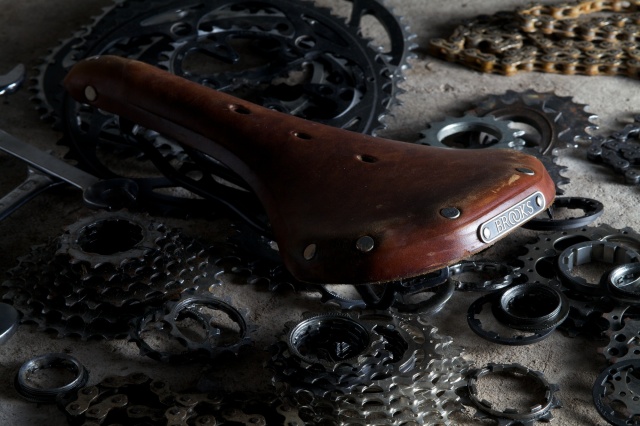
For the third image, a circular reflector was positioned to the left of the scene, opposite the flash at about 90cm from the saddle, roughly the same distance as the flash is to the right. The reflector was white material with a matt finish but reflects enough light to begin to give some detail in the shadows. For example, we can now see some shape in the front part of the saddle and the curve of the leather.
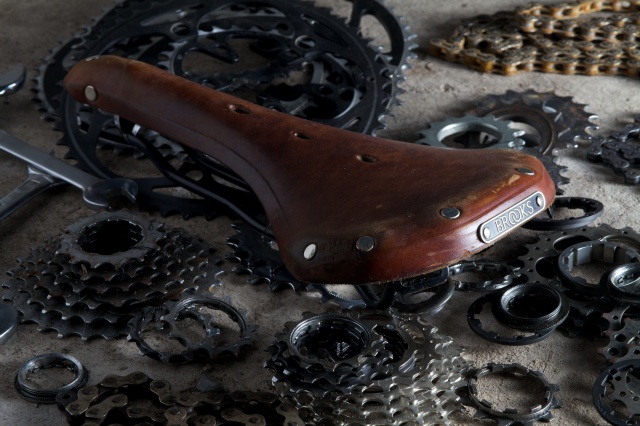
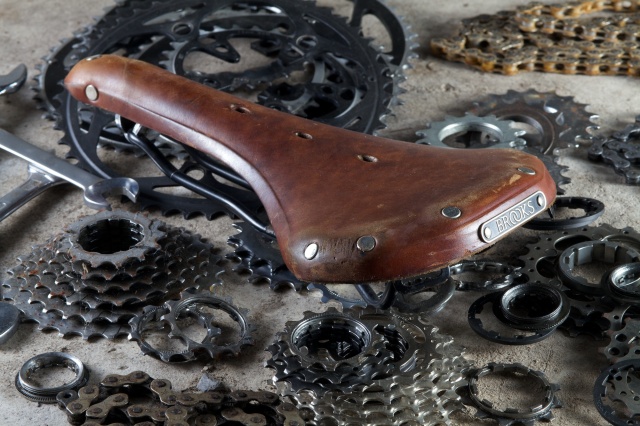
Next, the same reflector was then moved closer, to around 50cm from the saddle. The intensity of a diffuse reflection, such as the one bounced from the reflector, follows the inverse square law meaning that a source at any particular distance will light an object with and intensity four times as bright at the same source, twice as far away. Or more simply, move the reflector closer, it’ll have a greater effect. This is demonstrated in the image above that is now much more balanced with good detail in the areas of the image that are not lit by the main light.
The white reflector was then swapped for a silver reflector with a shiny surface, meaning that even more light is being reflected back towards the scene from the main light. There is still a gradient (the flash is still brighter than the reflected light) but the balance is much better. We can now see colour and form in the saddle and highlights on the rails showing is that they are a tubular shape. We can now identify each individual part in the scene.
Swapping the reflector for a gold coloured shiny surface means that all of the reflected light is now coloured. This demonstrates what we have learned above in that all area lit only by the reflector are gold. Surfaces lit by both are less coloured and to greater or lesser extent.
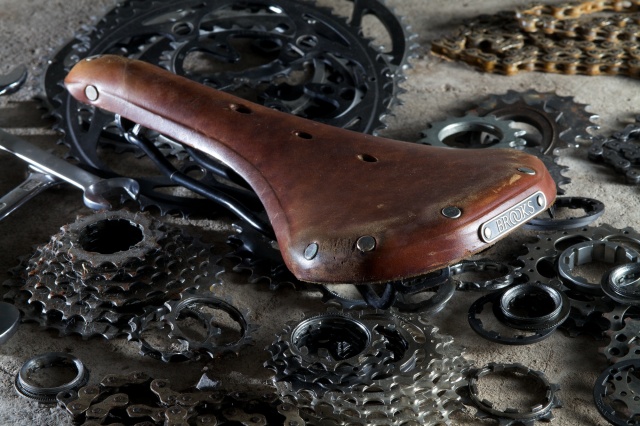
Rather than using reflectors, the same effect can be achieved by using a second light source. Here, I positioned a second flash gun opposite the first, at the same distance from the scene and used a hand held diffuser in front of it. Guide numbers of flash guns is probably a topic for another time, but suffice to say, the Canon light on the right, used as the main light (guide number 43) is slightly brighter than the Jessops unit on the left (GN36). The resulting image is well balanced and pleasantly lit. There are still some areas of shadow, but they are very soft edged. It is the lowest contrast image of the set.
This time, the second flash was not diffused, but reduced to half-power. The highlights (on the inner curve of the leather) are bright and some detail is lost.
Finally, the same arrangement but with the flash at 1/16th power. The small, high contrast light source does little to to reduce the contrast of the scene or soften shadows. It only contributes some highlights and edge lighting (to the spanner for example), improving from the earlier single diffused light picture.
This was an extremely useful and satisfying exercise. A high contrast image can be powerful and useful to show outline and shape, but often at the expense of detail that will show us form and colour. Understanding how to reduce contrast is valuable.
The set-up
References

[…] Beginning with the light at the same height as the subject and camera, I shot with the light in front next to the camera, then at 90, 135 and 180 degrees to the camera. Shooting directly into the flash meant that for this shot only (fig. 04), I reduced the aperture to prevent the figure disappearing into the light. For the pictures with the light to the right of the subject and at the same height, I used a black reflector to the left of the model to prevent any reflection from the wall to the left. We’ll get on to using reflectors to reduce contrast and fill the shadows in another exercise. […]
[…] These pictures show that the bark is heavily textured, but because of the lighting, there is no detail in the dark areas of shadow caused by the high-contrast light sources. To show texture and increased detail, the surface could have been photographed with a lower-contrast light source (on a cloudy day or with a large softbox) to light all areas and angles of the surface more evenly. Or, the shadows could have been softened as we learned in an earlier exercise. […]